This post is from the time I first started playing with OAuth2 authorisation. In the following, I walk through how I created a simple Google+ and calendar-based app using Google Oauth2, nodejs, and express. This simple app authenticates with a Google account to request (and be granted) permission to see a user's calendar. This post mainly follows the tutorial here but updates some of its instructions due to the changes in Google APIs.
The following figure from https://developers.google.com/identity/protocols/OAuth2 depicts what this web app does. The Google API for my app is Google+ and calendar.

I have divided the post into several steps.
Step 1 mainly covers the necessary set-up, and most importantly registering the app with Google. Step 2 is the creation of express/nodejs app.
Step 3 goes over the main program file: app.js. This is the heart of the program.
Step 4 describes the Google API part, which importantly sets-up OAuth, and defines which Google APIs to use.
Step 5 creates the JS files for different routes - e.g., what happens when you go to the index page, or click to give authorisation etc.
Step 6 creates the view files - i.e., decides how the pages should look like. This part I spent the least effort as my goal was just to test the Oauth2-based authorisation.
OK, here goes the details:
Step 1: Prerequisites and Google set-up
Node.js and npm need to be installed. And, of course, you need an account with Google.
The following figure from https://developers.google.com/identity/protocols/OAuth2 depicts what this web app does. The Google API for my app is Google+ and calendar.
I have divided the post into several steps.
Step 1 mainly covers the necessary set-up, and most importantly registering the app with Google. Step 2 is the creation of express/nodejs app.
Step 3 goes over the main program file: app.js. This is the heart of the program.
Step 4 describes the Google API part, which importantly sets-up OAuth, and defines which Google APIs to use.
Step 5 creates the JS files for different routes - e.g., what happens when you go to the index page, or click to give authorisation etc.
Step 6 creates the view files - i.e., decides how the pages should look like. This part I spent the least effort as my goal was just to test the Oauth2-based authorisation.
OK, here goes the details:
Step 1: Prerequisites and Google set-up
Node.js and npm need to be installed. And, of course, you need an account with Google.
Google app registration is done in https://console.developers.google.com/ . The first step is to create a new application.
This is pretty straightforward using the Google console. A few pointers are provided in the following.
To enable Google+ API, in the dashboard, I needed to select Enable and manage APIs, and click Overview window, Enabled APIs tab, and select Google+ API.
Credentials tab is used o create New credentials - OAuth client ID. This asks to configure the OAuth consent screen first. When the configuration is saved, the next screen asks for the application type: a Web application in this case. Clicking create moves to the next screen to fill the homepage url (e.g., http://localhost:3000). I left Authorised redirect URI to be filled in later. Clicking create generates the OAuth client information for the application, which includes a Client ID and a client secret. This needs to be kept in a safe place.
Step 2: Local set-up
To create the Node.js app, I used the Express application generator in command-line ((More information here.)
express sampleapp
express sampleapp
This creates the following directories/files:
- Public: This directory contains 3 sub-directories: images, javascript, and stylesheets. Instead of creating my own, I used the basic style.css that came with the Express application generator.
- routes: This directory contains all the .js files that has the route logic (e.g., what happens when index of the homepage is visited).
- views: This directory contains all the .jade (or any other type) files which contains what goes to the pages.
- bin: has the start-up script www.
- node_modules: has all the modules the app needs.
- package.json
- app.js
The app is installed by typing npm install in the app directory, which pulls in all the dependencies into the node_modules directory.
After creating the boilerplate, I started customising things by modifying the app.js file.
This is how app.js looked like at the end:
The main differences compared to the app.js generated by the app generator are the following.
1. The gapi variable, which is the variable for Google API, and will be discussed next.
2. The routes, which will be created in the next steps:
Before going into the different files under routes, it is best to describe the Google API variable gapi.
To define this, I created a lib directory, and underneath created the gapi.js:
Step 3: Customising the app.js
After creating the boilerplate, I started customising things by modifying the app.js file.
This is how app.js looked like at the end:
1 2 3 4 5 6 7 8 9 10 11 12 13 14 15 16 17 18 19 20 21 22 23 24 25 26 27 28 29 | var express = require('express'), app = express(), path = require('path'), gapi = require('./lib/gapi'), cookieParser = require('cookie-parser'), bodyParser = require('body-parser'), logger = require('morgan'); var index = require('./routes/index'); var cal = require('./routes/cal'); var auth = require('./routes/oauth2callback'); app.set('views', __dirname + '/views'); app.set('view engine', 'jade'); app.use(logger('dev')); app.use(bodyParser.json()); app.use(bodyParser.urlencoded({extended:false})); app.use(cookieParser()); app.use(express.static(path.join(__dirname, 'public'))); app.use('/',index); app.use('/cal', cal); app.use('/oauth2callback', auth); // Error handling automatically generated by app-generator //is not shown module.exports = app; |
The main differences compared to the app.js generated by the app generator are the following.
1. The gapi variable, which is the variable for Google API, and will be discussed next.
gapi = require('./lib/gapi'),
2. The routes, which will be created in the next steps:
var index = require('./routes/index');
var cal = require('./routes/cal');
var auth = require('./routes/oauth2callback');

app.use('/',index);
app.use('/cal', cal);
app.use('/oauth2callback', auth);
Step 4: Google API
Before going into the different files under routes, it is best to describe the Google API variable gapi.
To define this, I created a lib directory, and underneath created the gapi.js:
1 2 3 4 5 6 7 8 9 10 11 12 13 14 15 16 17 18 19 20 21 22 23 24 | var googleapis = require('googleapis'), OAuth2Client = googleapis.auth.OAuth2, client = 'Your client id here', secret = 'Your secret here', redirect = 'http://localhost:3000/oauth2callback', oauth2Client = new OAuth2Client(client, secret, redirect), scopes = ['https://www.googleapis.com/auth/plus.me', 'https://www.googleapis.com/auth/calendar'] calendar_auth_url = oauth2Client.generateAuthUrl({ access_type: 'offline', scope: scopes }) googleapis.options({auth: oauth2Client}); var my_calendars = [], my_profile = {}; exports.url = calendar_auth_url; exports.client = oauth2Client; exports.cal = googleapis.calendar('v3'); exports.plus = googleapis.plus('v1'); exports.my_calendars = my_calendars; exports.my_profile = my_profile; |
This creates an OAuth2client with the client ID and secret received in the Step 1-Google set-up. Then, I went back to the Google console and edited the redirect URL for the application to: http://localhost:3000/oauth2callback to match the redirect defined in gapi.js.
Before the application can access private data using a Google API, it must obtain an access code (I used the authorisation code grant type of OAuth2). Scopes control the set of resources and operations that an access token permits. In this case, two scopes are defined referring to the Google plus profile and calendar.
The access_type in line 11, indicates whether the application needs to access a Google API when the user is not present at the browser. This parameter defaults to online. If the application needs to refresh access tokens when the user is not present at the browser, then offline is used. This will result in the application obtaining a refresh token the first time the user authenticates the application. Note that the code described here does not handle saving the refresh token for this purpose.
Using the googleapis.options, oauth2Client in line 14, the oauth2Client is given as the global authentication method (otherwise, it has to be provided for each Google Service API).
I decided to also maintain and export the data, that is read from the Google Plus profile and calendars, in my_profile and my_calendars.
Note: Helpful pages to read for authentication and Google API for node.js:
https://developers.google.com/drive/v2/web/quickstart/nodejs
https://github.com/google/google-api-nodejs-client
https://developers.google.com/identity/protocols/OAuth2WebServer
Note: Helpful pages to read for authentication and Google API for node.js:
https://developers.google.com/drive/v2/web/quickstart/nodejs
https://github.com/google/google-api-nodejs-client
https://developers.google.com/identity/protocols/OAuth2WebServer
Step 5 - Routes
The contents of the routes/index.js file are:
1 2 3 4 5 6 7 8 9 10 11 12 13 14 15 | var express = require('express'); var gapi = require('../lib/gapi'); var router = express.Router(); router.get('/', function(req,res){ res.render('index', {title:'Sample app', url: gapi.url, url_text: 'Get permissions' } ); }); module.exports = router; |
This is again a slight modification to the index.js file originally created by the node generator.
It puts the gapi.url on the index page to get permissions. (See the Figure 'index page' under Testing section.)
Clicking on the link, the user ir redirected to a consent page, where the user can allow the application access. Then, the app is redirected to the return URL, which was defined as redirect in gapi.js.
Clicking on the link, the user ir redirected to a consent page, where the user can allow the application access. Then, the app is redirected to the return URL, which was defined as redirect in gapi.js.
routes/oauthcall2back.js
This part handles what to do when we are redirected from the Google sign-in back to the application.
This part handles what to do when we are redirected from the Google sign-in back to the application.
1 2 3 4 5 6 7 8 9 10 11 12 13 14 15 16 17 18 19 20 21 22 23 24 25 26 27 28 29 30 31 32 33 34 35 36 37 38 39 40 41 42 | var express = require('express'); var gapi = require('../lib/gapi'); var router = express.Router(); router.get('/', function(req,res){ var code = req.query.code; console.log(code); gapi.client.getToken(code, function(err,tokens){ gapi.client.credentials=tokens; getData();}) res.render('index.jade', {title: 'Sample App Authorized', url: 'http://localhost:3000/cal', url_text: 'Profile and Calendar'}) }); var getData = function(){ gapi.plus.people.get({userId: 'me'}, function(err, response){ gapi.my_profile.displayName = response.displayName; gapi.my_profile.name= response.name; }); gapi.cal.events.list({ calendarId: 'primary', timeMin: (new Date()).toISOString(), maxResults:10, singleEvents: true, orderBy:'startTime', }, function(err, response){ if(err){ console.log('The API returned an error:'+err); return; } var events = response.items; gapi.my_calendars.length=0; for(var i=events.length-1; i>=0; i--){ gapi.my_calendars.push(events[i].summary); } }) } module.exports = router; |
In lines 8-10, the access code is exchanged with a token. The getToken function uses the grant type authorization_code. Using this function,authorisation code returned by Google is exchanged for an access_token, id_token and a refresh_token. After the first authorisation, every call to getToken returns an access_token and also an id_token.
(ID tokens are a standardized feature of OpenID Connect designed for use in sharing identity assertions on the Internet. An ID Token is a JWT (JSON Web Token), that is, a cryptographically signed Base64-encoded JSON object.)
This code does not handle the storing of the refresh tokens and note that the refresh_token is returned only in the first instance, when the user authorises the app. If the refresh_token is stored, it can be used to get an access_token (this is what it means to operate in the "offline" mode). In this case, the grant_type is refresh_token. The response to this request would include a new access token, its expiry value, and a new refresh token. Note that refresh tokens are used only once (i.e., cannot be reused).
Since the oauth2client was given as the global authentication method, it is not necessary to provide it as auth for each service we are accessing. The services Google plus and calendar are accessed through gapi, which exports googleapis.calendar and googleapis.plus (see Step 3 - gapi.js).
In line 17, to access the Google+ profile, the userID is given as 'me' - referring to the authenticated user. This app stores only the display-name and name from the returned response.
In line 23, when accessing the Google calendar, the application asks the most recent 10 events from the primary calendar. The returned events are pushed to the gapi.my_calendars, which stores the user's events.
Note :In line 35, to purge the existing items from my_calendars, the length of the array is set to 0. There are other ways to delete items from the array, but this seemed the most convenient option.
Note: To find more information about the Google APIs, look at https://developers.google.com/apis-explorer/.
Note: To find more information about Google+ Profile, look at https://developers.google.com/+/web/api/rest/latest/people
routes/calendar.js
Finally, the calendar is displayed using this script.
Finally, the calendar is displayed using this script.
1 2 3 4 5 6 7 8 9 10 11 | var express = require('express'); var gapi = require('../lib/gapi'); var router = express.Router(); router.get('/', function(req,res){ res.render('cal.jade', {title: 'Sample App Calendar', displayName: gapi.my_profile.displayName, firstName: gapi.my_profile.givenName,
lastName: gapi.my_profile.familyName,
calendar: gapi.my_calendars}) }); |
Step 6 - Views
Under the views folder, we have the necessary .jade front-end files.
There is already a layout.jade file, created by the app generator.
I modified the index.jade file to:
1 2 3 4 5 | extends layout block content h1= title p Welcome to #{title} |
I also added a cal.jade file to display the profile and calendar information.
1 2 3 4 5 6 7 8 9 10 |
extends layout block content h1= title h2="Display name: " + displayName p= "Name: " + firstName +" "+ lastName p Calendar if calendar.length == 0 p No events! each event in calendar p=event |
Finally, testing
If everything is right, typing npm start, starts the applications:
SampleApp@0.0.1 start /Users/cigdem/Development/Node/sample_app_with_google_oauth2
node ./bin/www
Opening a browser, and typing localhost:3000.
 |
| Index page |
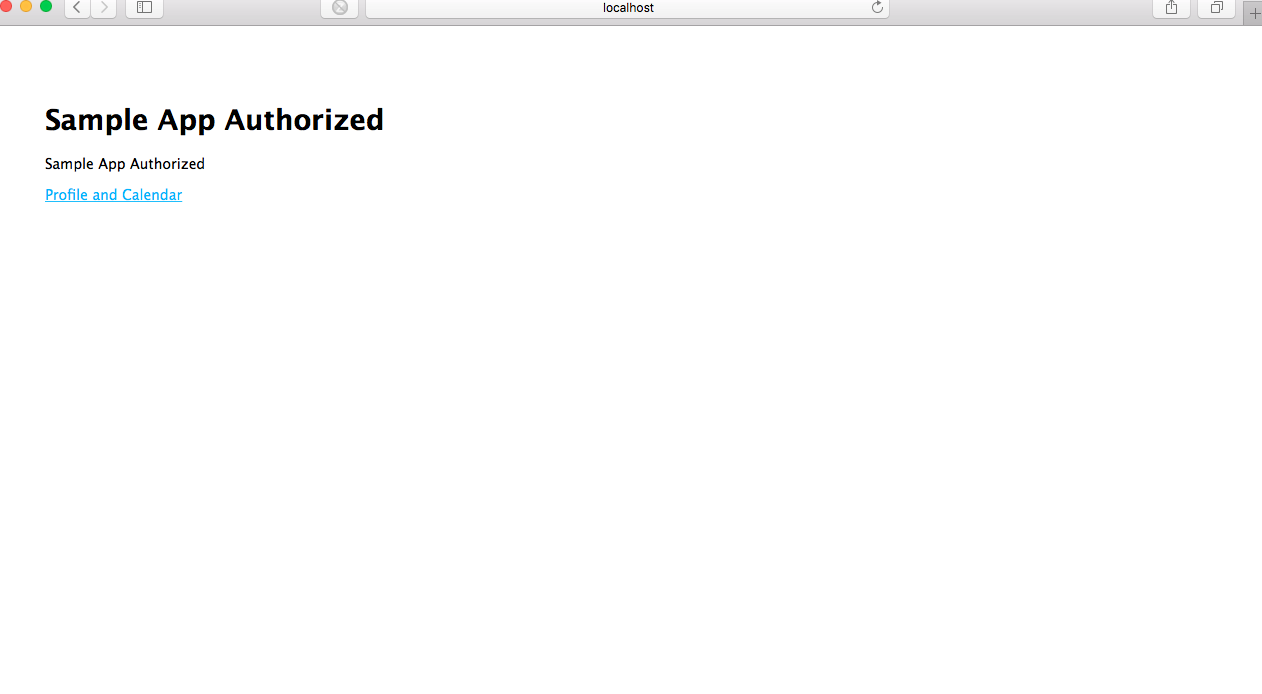 |
| When the user gives permission to the app to access, the Sample App Authorised page is returned. |
Then clicking Profile and Calendar displays:

Comments